Classic Crème Brûlée
Highlighted under: Modern Inspiration
I have always been captivated by the velvety richness of crème brûlée, and creating it at home felt like a culinary challenge I had to take on. Each time I carefully pour the creamy custard into ramekins, I'm filled with anticipation for that first crack of the caramelized sugar topping. The key lies in the balance of flavors—from the vanilla bean infusion to the delicate hand-torching of the sugar. This dessert not only brings joy to my dinner parties but also fills the air with the warm aroma of indulgence.
When I first attempted to make crème brûlée, I was astounded by the simplicity yet complexity of the flavors. I learned that using fresh vanilla beans enhances the custard with a depth that extracts cannot match. Each bite was a revelation—smooth, creamy, and perfectly sweetened.
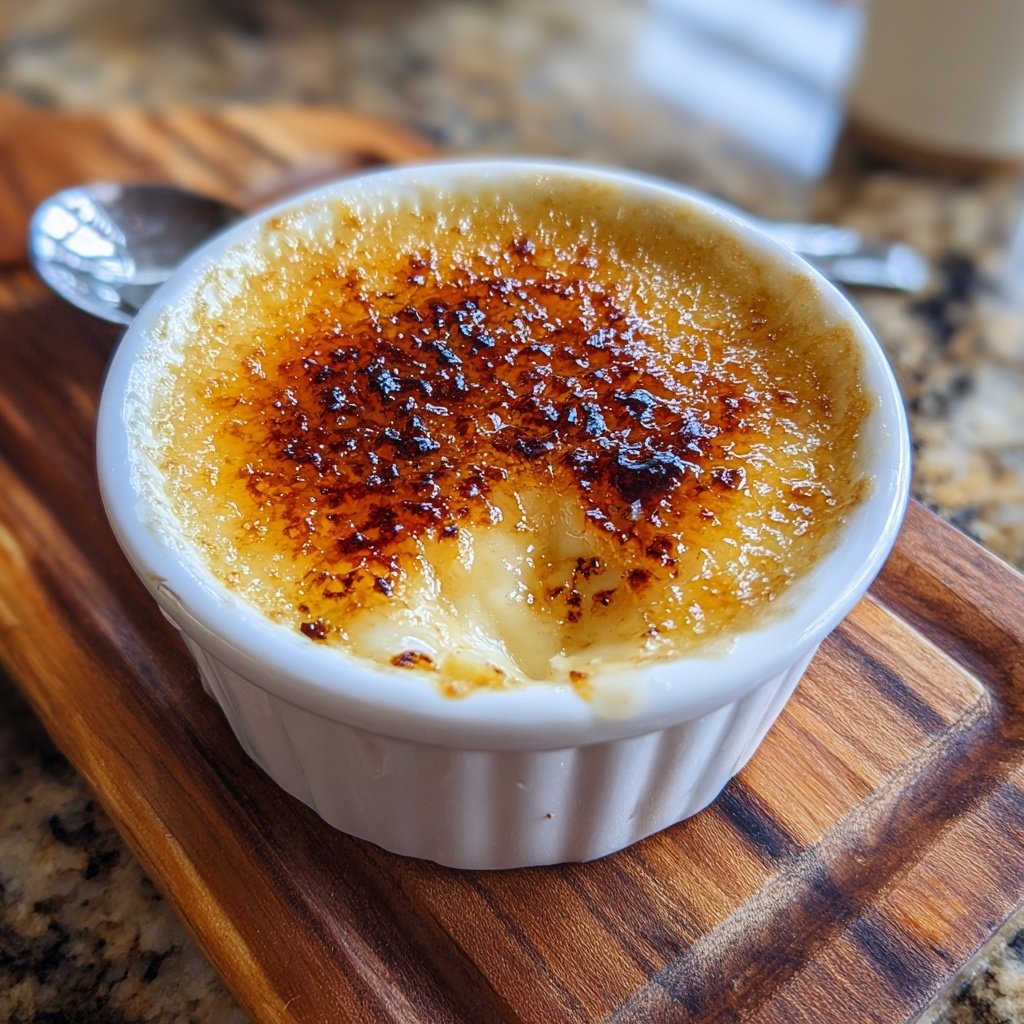
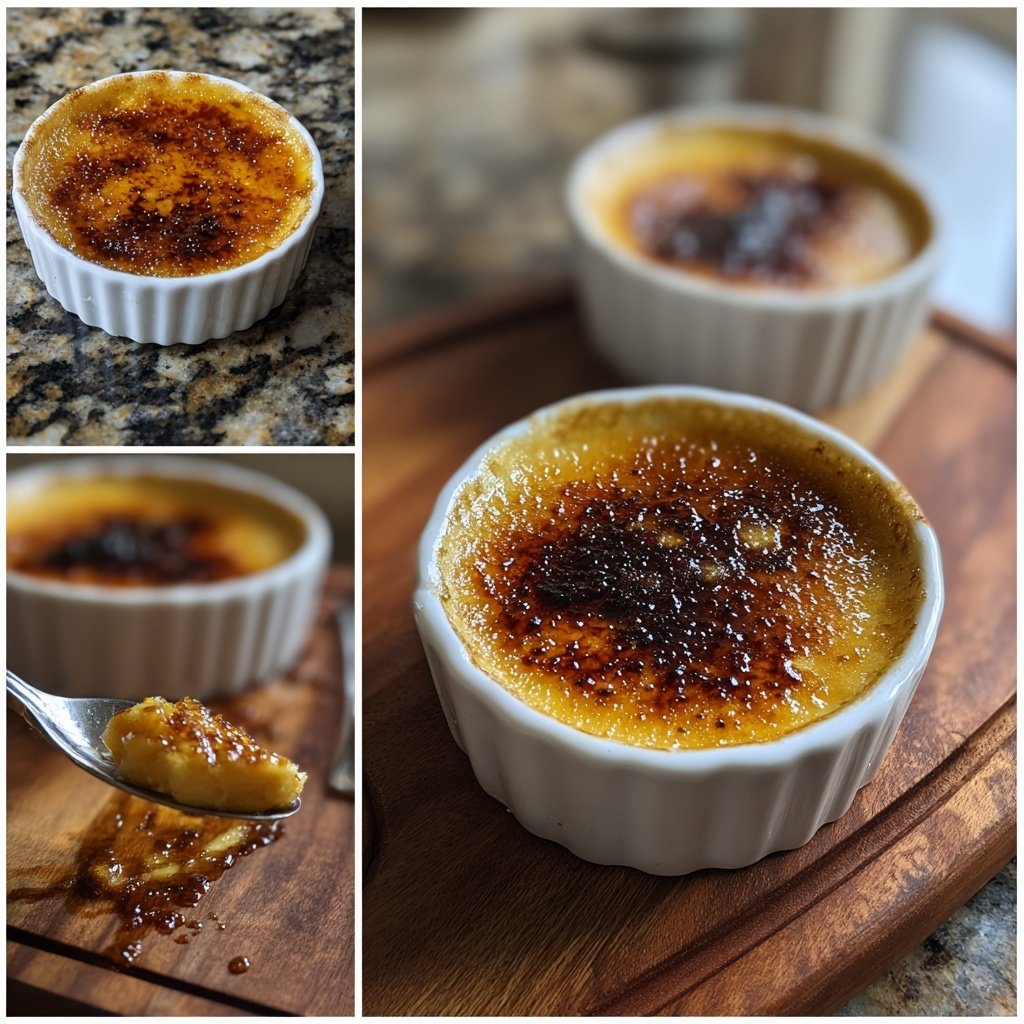
The technique of torching the sugar crust is what truly makes this dessert memorable. I discovered that a good layer of sugar followed by a few seconds of heat creates a satisfying crunch that contrasts beautifully with the silky custard underneath. It's an experience that never fails to impress!
Why You Will Love This Recipe
- Rich chocolate flavor paired with fresh orange zest
- Creamy texture that melts in your mouth
- Perfect for celebrations or as a sweet indulgence
Understanding the Key Ingredients
The essence of crème brûlée lies in its simplicity, with a handful of ingredients yielding a remarkably sophisticated dessert. Heavy cream is crucial, as it provides the rich, velvety texture that defines the custard. Using a quality vanilla bean not only infuses the custard with a deep, aromatic flavor but also creates specks that enhance its visual appeal. If vanilla beans are hard to find, you can substitute with high-quality vanilla extract, but the results might lack the depth of flavor and elegance that a bean provides.
When preparing the egg yolks, ensure they are fresh, as they help to thicken the custard. The mixture should be whisked until it’s thick and pale, which is indicative of emulsifying the yolks with sugar, thus creating a custard base that remains smooth and luscious. Over-whisking can incorporate too much air, leading to bubbles that can compromise the silky texture, so whisk gently to achieve that perfect consistence.
Perfecting the Cooking Technique
Baking in a water bath is essential for achieving a smooth texture while preventing the custard from cracking. This method ensures even cooking and gentle heat distribution; however, make sure your oven is properly calibrated since oven temperatures can vary. Inserting a knife or toothpick into the center should yield a slightly jiggly custard but set on the edges. Removing them too early leads to a runny texture, while overbaking results in a grainy mess.
Cooling and chilling the custards are just as important as the baking step. Allowing them to cool gradually at room temperature prevents condensation, which can dilute the custard's flavor, before moving them to the refrigerator. A minimum of two hours chilling time is needed for them to fully develop their flavor and texture, but overnight is even better for deeply infused vanilla notes.
Ingredients
Ingredients
For the Crème Brûlée
- 2 cups heavy cream
- 1 vanilla bean, split and scraped
- 4 large egg yolks
- 1/2 cup granulated sugar
- 1/4 cup brown sugar, for topping
Instructions
Instructions
Prepare the Cream Mixture
In a saucepan, combine the heavy cream and the scraped vanilla bean pod and seeds. Heat the mixture over medium heat until it's just about to boil. Remove from heat and let steep for 15 minutes.
Whisk Eggs and Sugar
In a bowl, whisk together the egg yolks and granulated sugar until the mixture is thick and pale. Gradually incorporate the warm cream, stirring continuously.
Bake the Custards
Preheat your oven to 325°F (160°C). Pour the custard mixture into ramekins and place them in a baking dish. Fill the dish with hot water until it reaches halfway up the sides of the ramekins. Bake for 30 minutes, or until set.
Chill and Brûlée the Tops
Allow the custards to cool at room temperature before refrigerating for at least 2 hours. When ready to serve, sprinkle a thin layer of brown sugar on top of each custard and carefully torch until caramelized and crispy.
Pro Tips
- For the best results, use a kitchen torch to caramelize the sugar. Ensure an even layer of sugar and move the torch in small circles to avoid burning. Also, letting the custard chill is crucial for achieving the right texture.
Tips for Caramelizing the Sugar
Caramelizing the sugar on top of the custard is a technique that can make or break your dessert. It’s imperative to evenly sprinkle a thin, uniform layer of brown sugar over the cooled custards — this ensures even melting and caramelization. Using too much sugar can lead to a thick, hard crust that is difficult to crack, whereas too little can result in a soft texture without that delightful crunch. Maintain a distance of around 2 inches with the torch to create an even browning without scorching.
If you don’t have a kitchen torch, you can also achieve the caramelized topping using the broiler method. Simply place the ramekins on a baking sheet and broil them in the oven, keeping a close watch to prevent burning. Rotate the ramekins as needed for a uniform caramelization. But remember, this method requires rapid attention, so keep your oven lights on to catch the moment when the sugar turns bubbly and golden.
Variations and Storage Ideas
While classic vanilla crème brûlée is a timeless choice, feel free to personalize your custard with flavors like citrus zest or coffee. Infusing your cream with cardamom or after it's heated, incorporating a fresh herb like rosemary can elevate the dessert further. Just be sure to strain your mixture before pouring into ramekins to eliminate any particles from spice or herb infusions.
To store, cover the cooled ramekins with plastic wrap and keep them in the refrigerator for up to three days. It’s best to caramelize the sugar just before serving to ensure the crispy crust remains intact. Unfortunately, once caramelized, they should be consumed within a few hours to preserve their texture. If you plan to serve later, a little extra brown sugar on top will help to achieve that perfect burnish at the last minute.
Questions About Recipes
→ Can I make crème brûlée ahead of time?
Yes, you can prepare the custards a day in advance and keep them chilled until ready to serve.
→ Is it necessary to use a vanilla bean?
While vanilla extract can be used, a vanilla bean offers a richer flavor and beautiful flecks in the custard.
→ What can I use if I don't have a kitchen torch?
You can place the crème brûlée under a broiler on a baking sheet for a few minutes, but keep a close eye to prevent burning.
→ How do I know when the custard is set?
The custard should be slightly jiggly in the center but firm around the edges when done.
Classic Crème Brûlée
Created by: Olwen Bradford
Recipe Type: Modern Inspiration
Skill Level: Intermediate
Final Quantity: 4 servings
What You'll Need
For the Crème Brûlée
- 2 cups heavy cream
- 1 vanilla bean, split and scraped
- 4 large egg yolks
- 1/2 cup granulated sugar
- 1/4 cup brown sugar, for topping
How-To Steps
In a saucepan, combine the heavy cream and the scraped vanilla bean pod and seeds. Heat the mixture over medium heat until it's just about to boil. Remove from heat and let steep for 15 minutes.
In a bowl, whisk together the egg yolks and granulated sugar until the mixture is thick and pale. Gradually incorporate the warm cream, stirring continuously.
Preheat your oven to 325°F (160°C). Pour the custard mixture into ramekins and place them in a baking dish. Fill the dish with hot water until it reaches halfway up the sides of the ramekins. Bake for 30 minutes, or until set.
Allow the custards to cool at room temperature before refrigerating for at least 2 hours. When ready to serve, sprinkle a thin layer of brown sugar on top of each custard and carefully torch until caramelized and crispy.
Extra Tips
- For the best results, use a kitchen torch to caramelize the sugar. Ensure an even layer of sugar and move the torch in small circles to avoid burning. Also, letting the custard chill is crucial for achieving the right texture.
Nutritional Breakdown (Per Serving)
- Calories: 380 kcal
- Total Fat: 26g
- Saturated Fat: 15g
- Cholesterol: 195mg
- Sodium: 85mg
- Total Carbohydrates: 32g
- Dietary Fiber: 3g
- Sugars: 24g
- Protein: 6g