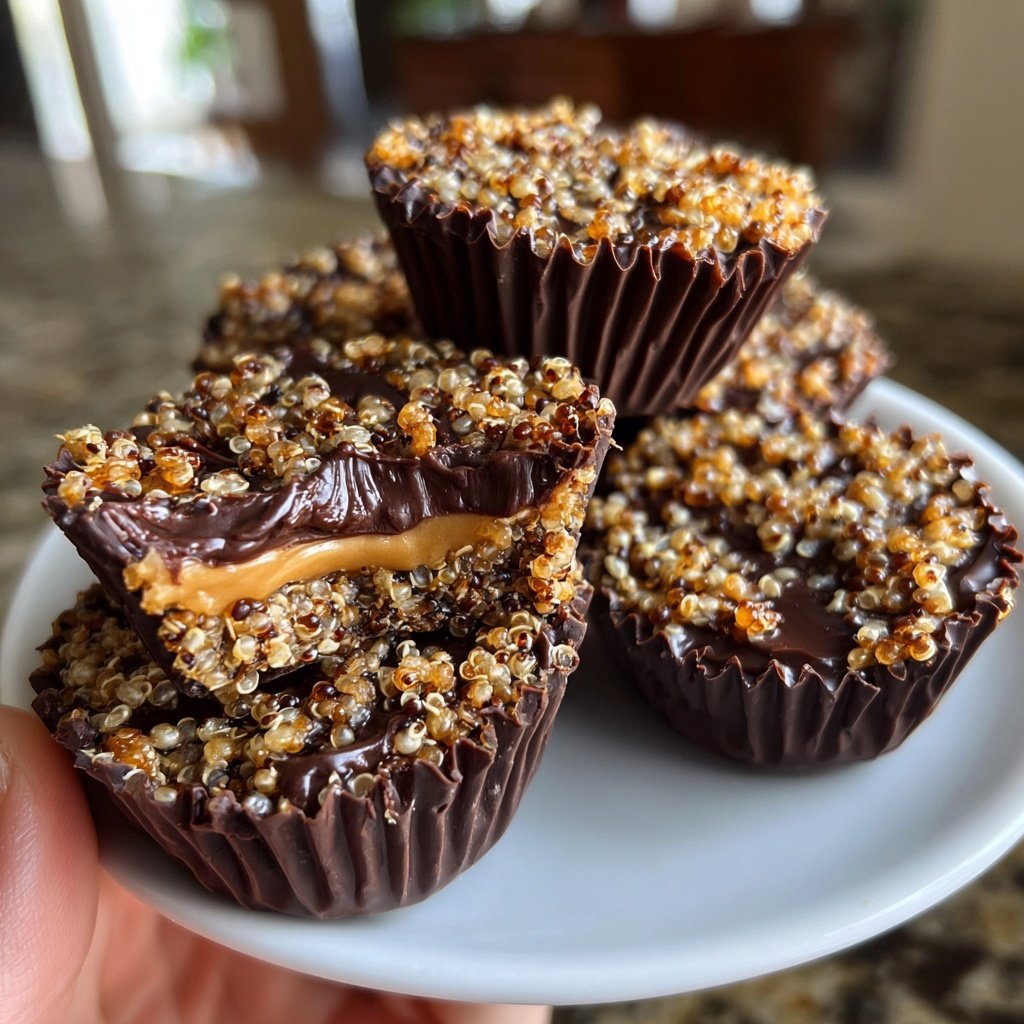
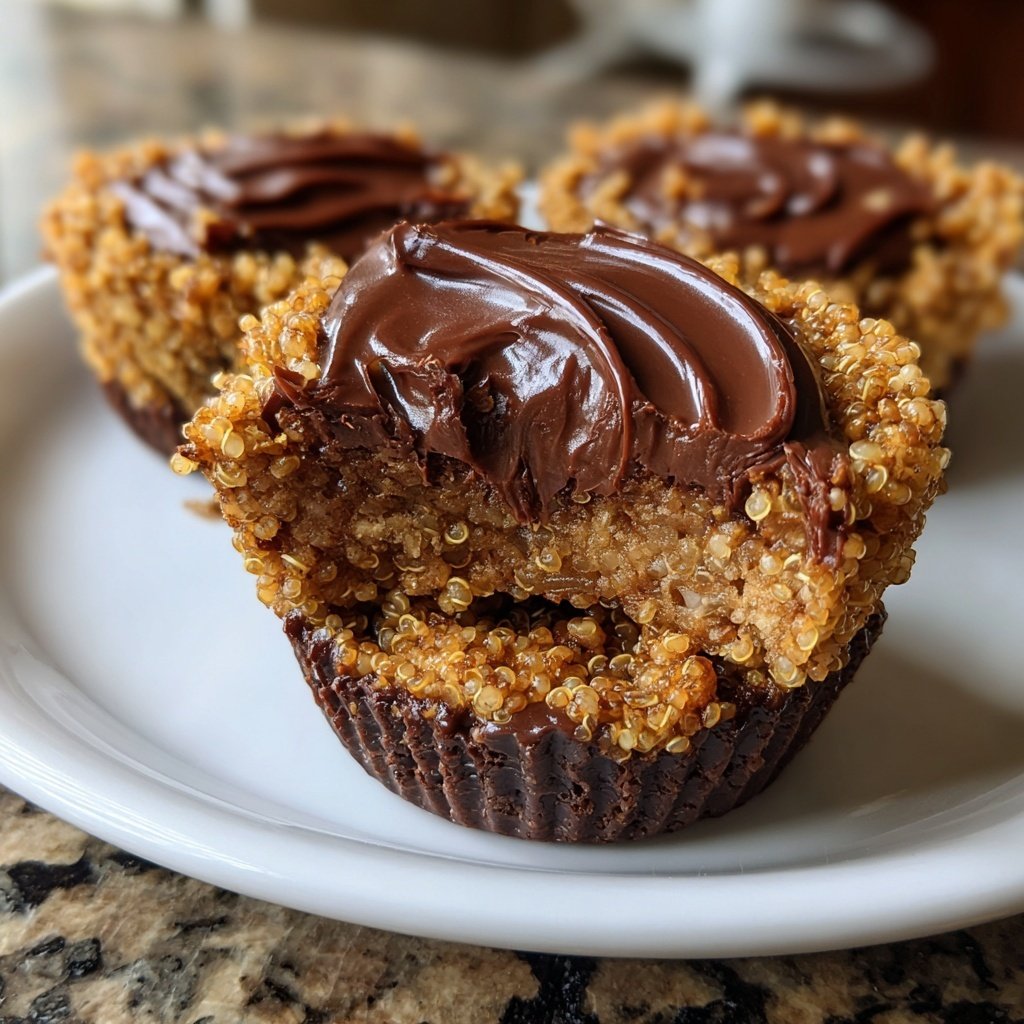
Homemade Peanut Butter Cups with Crunchy Quinoa
Highlighted under: Modern Inspiration
I absolutely love making my own peanut butter cups, and when I added crunchy quinoa, it took them to another level! The combination of creamy peanut butter, rich chocolate, and the delightful crunch of quinoa creates a texture that is simply unforgettable. With just a few simple ingredients and a bit of patience, I can whip up these delicious treats that satisfy my sweet tooth while also feeling a bit healthier. They’re perfect for sharing, or keeping all to myself for those late-night cravings!
When I first tried making peanut butter cups from scratch, I was surprised at how easy they were to put together. After a few attempts, I found that incorporating crunchy quinoa not only adds a delightful texture but also a bit of nuttiness that complements the peanut butter perfectly. This small adjustment made a huge difference in flavor!
I've experimented with different types of chocolate, and I've found that a good quality dark chocolate has the perfect balance of sweetness and richness for these treats. Each bite is an explosion of flavor and crunch that keeps me coming back for more!
Why You'll Love These Peanut Butter Cups
- Irresistibly crunchy texture from the quinoa
- Decadent chocolate coating that you can customize
- Sweet, salty, and totally satisfying
Perfecting Your Peanut Butter Cups
Creating the perfect peanut butter cups requires a balance between the creamy filling and the chocolate coating. Make sure to use high-quality dark chocolate with at least 60% cocoa content for a rich flavor that balances the sweetness of the peanut butter. I recommend choosing chocolate chips that are specifically designed for melting to ensure a smooth texture. If you prefer a sweeter cup, you can adjust the amount of powdered sugar in the peanut butter mixture to suit your taste.
The use of crunchy quinoa not only adds texture but also enhances the nutritional profile of your treats. Quinoa is a complete protein, and incorporating it into your cups means that you get additional fiber and nutrients without compromising on taste. When mixing it in with the peanut butter, make sure you fold it gently to maintain its crunchiness, allowing those delightful pops of texture to shine through in each bite.
Chilling and Setting for Success
Proper chilling is key to achieving a well-set peanut butter cup. After assembling the layers, make sure the chocolate base is fully chilled before adding the peanut butter filling. This initial chilling period should be at least 10 minutes to avoid the layers mixing together. You’ll know it’s ready if the chocolate is firm to the touch. Likewise, allow the completed cups to chill for at least 30 minutes, but for a deeper flavor profile, letting them sit longer in the fridge can be beneficial.
If you find that the chocolate is too thick to pour smoothly over the peanut butter mixture, you can reheat it gently in the microwave. Just be careful not to overheat—stop when it’s barely melted and stir until glossy. This will give you a sleek finish and a delicious chocolate couverture that looks as good as it tastes. Once chilled, use a sharp knife to clean up any edges if necessary, ensuring each peanut butter cup has a neat and appealing appearance.
Ingredients
Gather these simple ingredients to make your own delicious peanut butter cups!
For the Peanut Butter Cups
- 1 cup creamy peanut butter
- 1/2 cup crunchy quinoa
- 1 cup dark chocolate chips
- 2 tablespoons coconut oil
- 1/4 cup powdered sugar
- 1/4 teaspoon salt
Combine these ingredients to create a delightful treat that everyone will love!
Instructions
Follow these easy steps to make your homemade peanut butter cups!
Prepare the Molds
Line a muffin tin with paper liners or grease them lightly. This will help the cups come out easily once they are set.
Melt the Chocolate
In a microwave-safe bowl, combine the dark chocolate chips and coconut oil. Heat in 30-second intervals, stirring in between, until smooth and fully melted.
Create the Chocolate Base
Spoon a small amount of melted chocolate into each mold, just enough to cover the bottom. Place the muffin tin in the refrigerator for about 10 minutes to set.
Mix the Peanut Butter Filling
In a bowl, mix the creamy peanut butter, powdered sugar, salt, and crunchy quinoa until well combined.
Assemble the Cups
Once the chocolate base is set, add a generous scoop of the peanut butter mixture on top of the chocolate in each mold. Press it down gently.
Top with Chocolate
Pour the remaining melted chocolate over each peanut butter layer, ensuring it's completely covered. Tap the mold gently to remove any air bubbles.
Chill and Set
Place the muffin tin back in the refrigerator for at least 30 minutes, or until completely set. Once firm, remove the cups from the molds.
Enjoy your homemade treats or store them in an airtight container in the fridge!
Pro Tips
- For additional flavor, consider adding a sprinkle of sea salt on top of the chocolate before it sets or use milk chocolate for a sweeter alternative.
Storage Tips
To keep your peanut butter cups fresh, store them in an airtight container in the refrigerator. They can last up to two weeks, but I find they rarely last that long! For longer storage, you can freeze them. Just ensure they're in a single layer and not touching each other before sealing them in a freezer-safe bag. They can be frozen for up to three months—perfect for satisfying those late-night cravings over time.
When you’re ready to enjoy your frozen cups, move them to the refrigerator to thaw for a couple of hours before indulging. This gentle approach preserves their texture and ensures that the chocolate remains creamy while the filling retains its delightful crunch.
Variations and Add-Ins
Feel free to customize your peanut butter cups with different mix-ins or flavors. For an extra twist, consider adding a pinch of cinnamon or a drizzle of honey to the peanut butter filling. You can also swap out dark chocolate for milk chocolate or even white chocolate, depending on your preference. Each variation provides a unique flavor profile while retaining the fundamentals of texture that make these treats so enjoyable.
To make them a little more festive, you could fold in festive sprinkles or crushed nuts into the peanut butter mixture before assembling. Not only does this add visual appeal, but it also enhances the flavor complexity and texture of the final product. Experimenting with different combinations can make each batch a delightful surprise!
Questions About Recipes
→ Can I use almond butter instead of peanut butter?
Yes, almond butter works wonderfully as a substitute and adds a unique flavor!
→ How should I store the peanut butter cups?
Store them in an airtight container in the refrigerator, where they will keep well for about a week.
→ Can I make these vegan?
Absolutely! Use dairy-free chocolate chips and ensure your peanut butter is also vegan-friendly.
→ What can I replace quinoa with?
If you don't have quinoa, you can substitute with crushed nuts or crispy rice for a similar crunch.
Homemade Peanut Butter Cups with Crunchy Quinoa
Created by: Olwen Bradford
Recipe Type: Modern Inspiration
Skill Level: Intermediate
Final Quantity: 12 cups
What You'll Need
For the Peanut Butter Cups
- 1 cup creamy peanut butter
- 1/2 cup crunchy quinoa
- 1 cup dark chocolate chips
- 2 tablespoons coconut oil
- 1/4 cup powdered sugar
- 1/4 teaspoon salt
How-To Steps
Line a muffin tin with paper liners or grease them lightly. This will help the cups come out easily once they are set.
In a microwave-safe bowl, combine the dark chocolate chips and coconut oil. Heat in 30-second intervals, stirring in between, until smooth and fully melted.
Spoon a small amount of melted chocolate into each mold, just enough to cover the bottom. Place the muffin tin in the refrigerator for about 10 minutes to set.
In a bowl, mix the creamy peanut butter, powdered sugar, salt, and crunchy quinoa until well combined.
Once the chocolate base is set, add a generous scoop of the peanut butter mixture on top of the chocolate in each mold. Press it down gently.
Pour the remaining melted chocolate over each peanut butter layer, ensuring it's completely covered. Tap the mold gently to remove any air bubbles.
Place the muffin tin back in the refrigerator for at least 30 minutes, or until completely set. Once firm, remove the cups from the molds.
Extra Tips
- For additional flavor, consider adding a sprinkle of sea salt on top of the chocolate before it sets or use milk chocolate for a sweeter alternative.
Nutritional Breakdown (Per Serving)
- Calories: 180 kcal
- Total Fat: 12g
- Saturated Fat: 4g
- Cholesterol: 0mg
- Sodium: 55mg
- Total Carbohydrates: 15g
- Dietary Fiber: 1g
- Sugars: 5g
- Protein: 5g